
Instructions for Capturing a Screenshot on a Windows Computer
Taking a screenshot on your PC, whether you recently purchased a new Surface device or are using an older machine, is a simple task. There are multiple methods available, but Microsoft’s Snipping Tool is likely the most flexible option as it allows you to capture your entire screen or a customized screenshot. This article provides instructions on how to take a screenshot on both Windows 11 machines and older devices running Windows 7.
How to take a screenshot of the entire screen
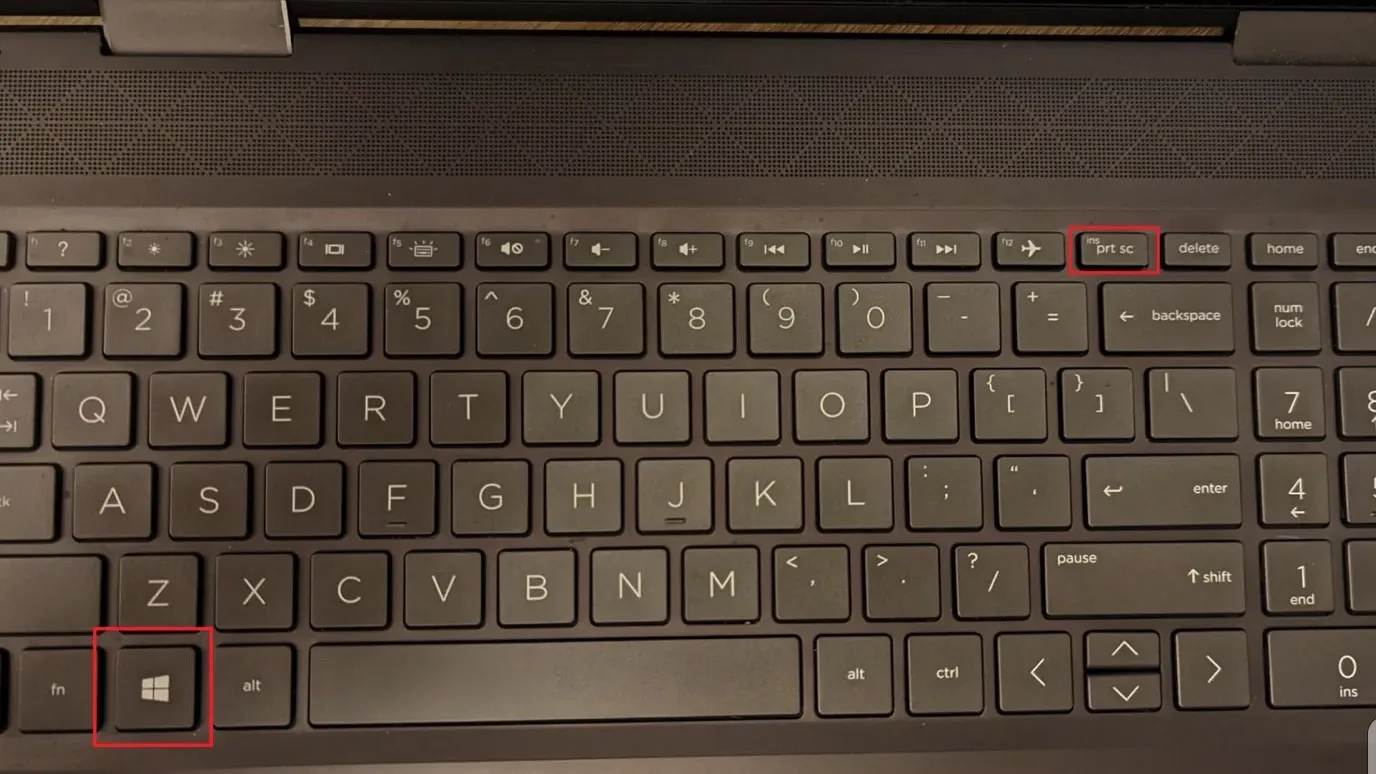
There are two different ways to take a screenshot in Windows. The first option is the Print Screen button: capture the entire screen by pressing the Windows key and the PrtScn key at the same time. If your computer doesn’t have a PrtSc button, press Fn + Windows key + Spacebar instead. To find the picture, open File Explorer and go to the Pictures folder and then the Screenshots subfolder.
On all devices with the latest version of Windows 11, pressing the Print Screen key will open the Snipping Tool, which you can read more about below.
How to take a screenshot of the active window
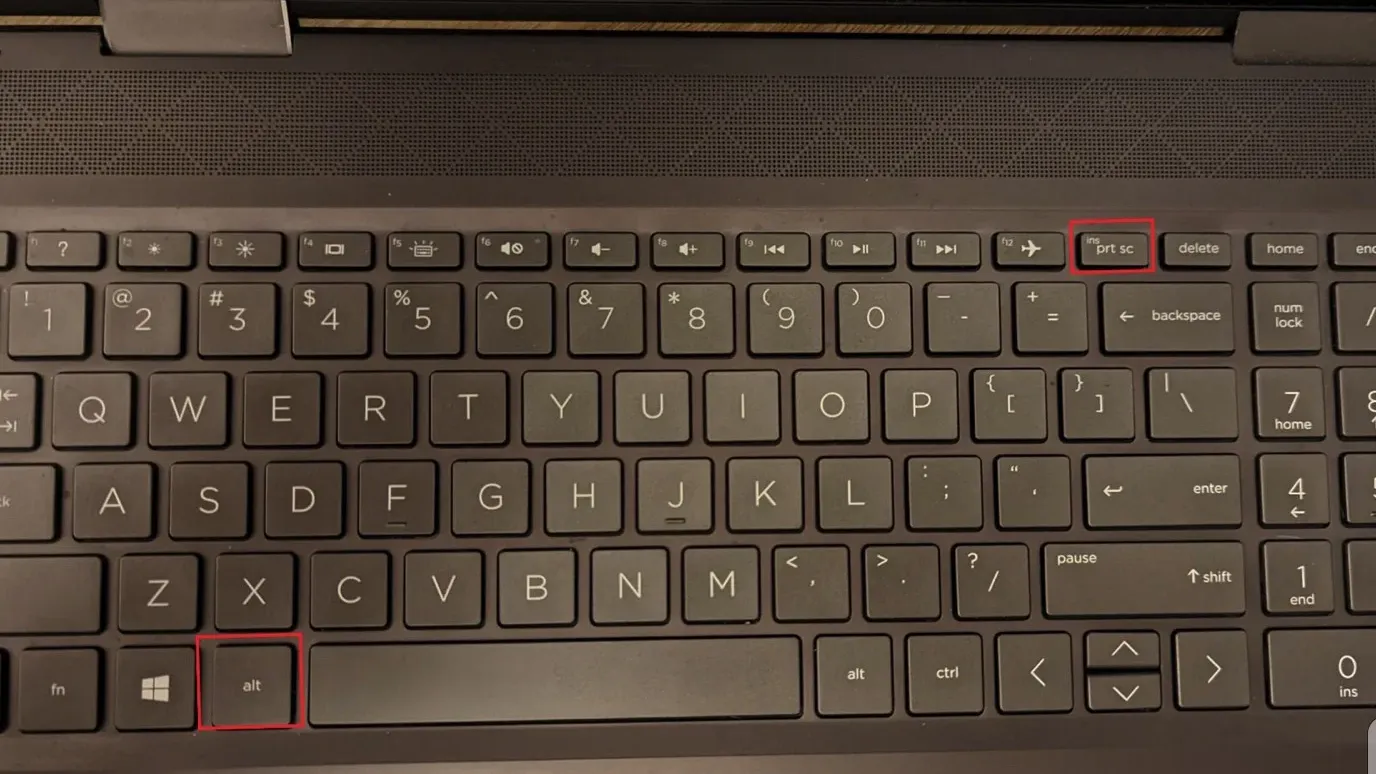
If you only want to save a picture of the window you’re currently in, press the Alt and PrtScn keys together. This will place the image on your clipboard. Although your computer saves screenshots in a specific folder, such partial screenshots are transferred to your clipboard. You’ll need to transfer them from the clipboard to an image editing program like Photoshop, Windows’ default Photos app, or even a document editor like Microsoft Office to save them in the file format of your choice.
Using the snipping tool
You can further edit your screenshot using the Windows Snipping Tool. On any Windows 10 or 11 machine, press either the Windows key + Shift + S together or the PrtScn key to open the Snipping Tool. If you’re using Windows 8.1 or 7, you’ll need to find the app in the Start menu. Both options give you a toolbar where you can customize the “cut”.
Here you can take freeform or rectangular images of your screen. All screenshots taken with the Snipping Tool will be sent to your clipboard. From the clipboard to save the image in the Screenshots folder and rename the file and change the file format. You can also annotate screenshots using the pen or highlighter icons.
The Snipping Tool has several hotkeys to help you customize your screenshot experience:
- Ctrl and +: Save the Snip
- Ctrl + C: Copy the Snip
- Alt + M: Select cutting mode
- Alt + D: Set a timer for the screenshot from 1 to 5 seconds
- Alt + M: Create another clip, but in the same mode. For example, if you took a rectangular clip, you can quickly make a new one using this method.
- Shift + Arrows: Switch between different types of clips
Bonus for Microsoft Surface users
If you have a Microsoft Surface device in tablet mode, press the power button and the volume up button at the same time to take a screenshot. If you have a keyboard connected, you can also follow the steps listed above. As on the desktop, the screenshot can be found by going to the Pictures folder and then Screenshots.

