Learn How to Scan Documents in Seconds Using Your iPhone
Whether you are a student or an office worker, there are times in your daily routine when you need to scan documents. Think of sending a passport, important files or even a copy of your driver’s license – the cases are endless. However, most iPhone users click on the document image and send it as is. But what if iOS and iPadOS had a built-in tool that would allow you to do the same more efficiently and in the right way?
Yes, you can easily scan and send documents on your iPhone or iPad and the process is quite simple. In addition, it even has a built-in level of automation.
Follow these steps to scan large documents quickly:
– First, go to the Files app on your iPhone or iPad.
– Next, tap on the three-dot menu in the upper right corner.
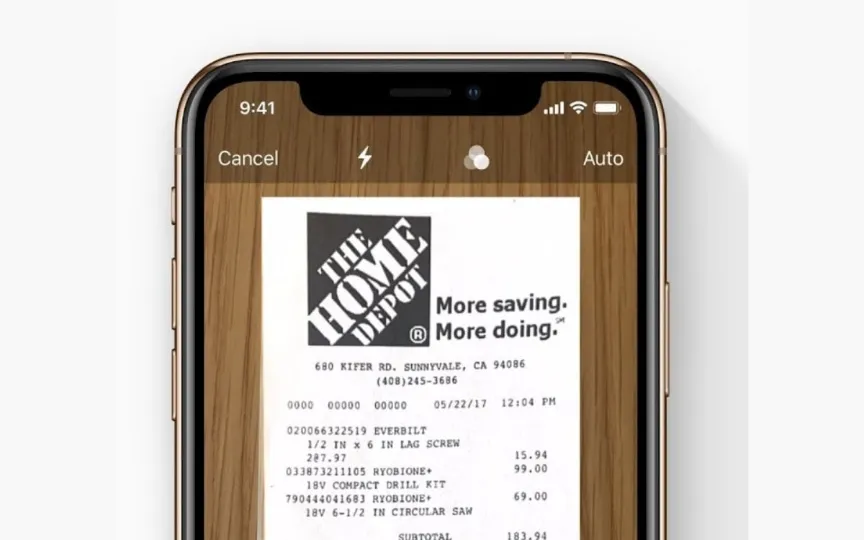
– When you tap on it, you will see an option to scan documents marked with a scanner icon; open it.
– Here you have two options: you can enable the feature to scan in auto shutter mode or switch to manual mode.
– You can select one of the two to scan the document. If you are in a hurry or scanning a large document, the Auto setting works quite well in our experience.
– In addition to being able to choose the scanning method, Apple also offers the option to scan it in color, grayscale, black and white or as a plain photo. In addition, you can also turn on the flash if there is not enough light.
– Once you’ve scanned, you can save the document as a PDF in the Files app and share it right away!
However, there are other ways to scan a document. You can also use Apple Notes for the same purpose. This way, if you use Notes frequently, you can add the scanned document directly to the note you’re making.